Firestore의 Cloud Storage 사용하기
1. 초기설정
Firestore 웹사이트
- Project 선택
- Storage (왼쪽 탭에서 선택)
- 시작하기
- 프로덕션 모드에서 시작하기 클릭

- Cloud Storage 위치 : asia-northeast3 으로 선택 후 완료 클릭

- 기본 버킷 생성 중...이 완료되면 아래화면처럼 나온다
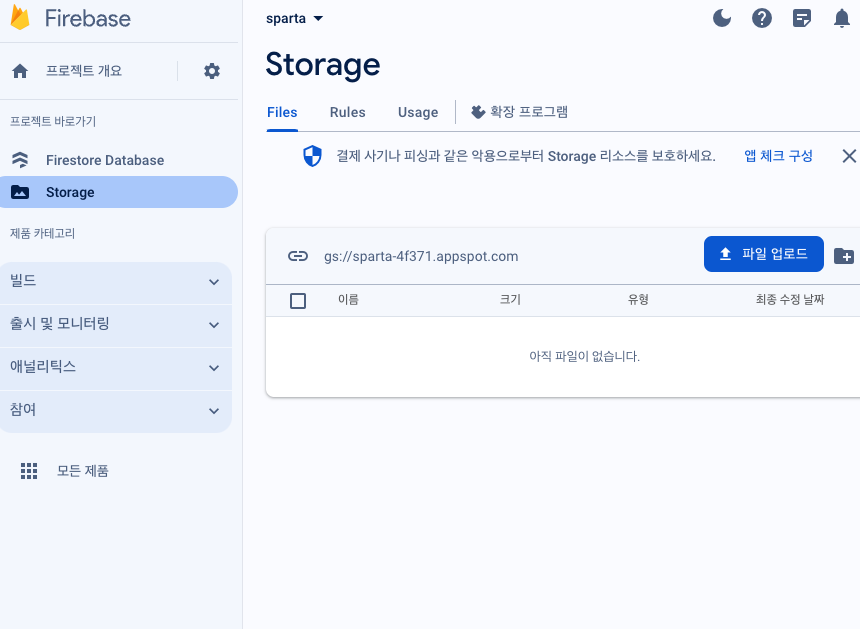
- 그런 다음 '파일 업로드'를 눌러, 사진 파일을 하나 업로드 해준 다음 그 아래 디스플레이쪽에 사진 파일이 저장되는 것을 확인하고, 다시 파일을 삭제한다
2. 파일 업로드 하기 : Firestore SDK 추가

MyPage.jsx
import React, { useEffect } from 'react';
import styled from 'styled-components';
import FileUpload from '../components/FileUpload';

function MyPage() {
  return (
    <StOuterFrame>
      <StMainContainer>
        {/* Layout(Header) */}
        <div></div>
        <StMyInformationContainer>
          <StProfilePicture />
          <StMyId>아이디 : </StMyId>
          <StButtonContainer>
            <StButton>홈으로 가기</StButton>
            <FileUpload />
          </StButtonContainer>
        </StMyInformationContainer>
        <StMyPostContainer>
          <h3>내가 쓴 글</h3>
          <StMyPostList>
            <StMyPost>포스트 1</StMyPost>
            <StMyPost>포스트 2</StMyPost>
            <StMyPost>포스트 3</StMyPost>
            <StMyPost>포스트 4</StMyPost>
          </StMyPostList>
        </StMyPostContainer>
      </StMainContainer>
    </StOuterFrame>
  );
}

export default MyPage;

... styled components
firebase.config.js
// firebase.js

import { getStorage } from 'firebase/storage';

export const storage = getStorage(app);
FileUpload.jsx
import { ref, uploadBytes } from 'firebase/storage';
import React, { useState } from 'react';
import { storage } from '../firebase/firebase.config';

function FileUpload() {

  const [selectedFile, setSelectedFile] = useState(null);

  const handleFileSelect = (event) => {
    setSelectedFile(event.target.files[0]);
  }

  const handleUpload = () => {
    const imageRef = ref(storage, "folder/file");
    uploadBytes(imageRef, selectedFile);
  };

  return (
    <div>
      <input type="file" onChange={handleFileSelect}/>
      <button onClick={handleUpload}>변경사항 저장</button>
    </div>
  )
}

export default FileUpload;
참고자료
웹에서 Cloud Storage 시작하기 | Cloud Storage for Firebase
Firebase 데모 데이가 시작되었습니다. Google 최고의 기술을 활용하여 AI 기반 풀 스택 앱을 빌드하고 성장시키는 방법에 관한 데모를 시청하세요. 의견 보내기 웹에서 Cloud Storage 시작하기 컬렉션을
firebase.google.com
GCP Cloud Storage + Springboot 연동하기
이번 외주를 맡은 내용이 Google Cloud Storage를 이용해서 file을 업로드, 다운로드하는 API 기능을 구현해서 이 내용을 정리하고자 한다. Cloud Storage를 다루는 방법으로 Google Cloud Console, Cloud SDK를 이용
jyami.tistory.com
파이어베이스 클라우드스토리지 시작하기(Firebase Cloud Storage)
https://firebase.google.com/docs/storage?hl=ko Cloud Storage | Firebase Cloud Storage는 사진, 동영상 등의 사용자 제작 콘텐츠를 저장하고 제공해야 하는 앱 개발자를 위해 만들어졌습니다. firebase.google.com Cloud Storag
jmkang1984.tistory.com
'부트캠프 개발일지 2023-2024 > Bootcamp 생활기록' 카테고리의 다른 글
| [9주차] 리액트심화: Route replace (0) | 2023.11.29 |
|---|---|
| [8주차] 리액트: CRA 부터 ~리덕스 초기설정까지 (0) | 2023.11.24 |
| [8주차] 리액트: 그룹 프로젝트 newsfeed, 음악 커뮤니티 만들기 (0) | 2023.11.21 |
| [7주차] 리액트: 커서 위치 맨 마지막으로 설정하기(setSelectionRange) (0) | 2023.11.17 |
| [7주차] 스탠다드 특강 : 리액트 라이프사이클, axios, loading/error (0) | 2023.11.17 |